What happened
Been a "fun" week. The mom board in my main CentOS PC died.Based on past experience I grabbed a older PC I'd been using to test deploy options for my co-hosted servers and swapped in the drives and would it not boot. Swapped back and found it too had taken this time to die. Found a slightly better PC online and got it and matching memory rush shipped. FedEx delivered it to the local fire station instead of my house. By the time FedEx got back to me about where it was I'd already called the local Frys and had them coming with and even better, and more expensive, PC. All that to give you an idea the fun level I was at when I started trying to use the new PCs to recover from my initial server failure.
So I had 2 PCs to work with
Refurbished: Acer Desktop Aspire TC TC-780-UR11 Intel Core i7 7th Gen 7700 (3.60 GHz) - 8 GB DDR4 - 1 TB HDD - Windows 10 HomeAnd
Dell Inspiron 3670 Desktop PC with Intel Core i7 Processor - 8GB Memory - 16GB Optane Memory + 1TB HD - Windows 10
Plus memory that should work in either.
Crucial 32GB (2 x 16GB) 288-Pin DDR4 SDRAM DDR4 2400 (PC4 19200) Desktop Memory Model CT2K16G4DFD824A
Each came with an 8 GB SIMM so one would think I was set to have a 32 GB in one and 16 GB in the other.
First off I wanted to get the data backed up which was its own adventure.
The steps boiled down to:
get the volume group id with
vgdisplay
In this case AQjjAr-C4Lg-O3qX-Y0RN-hsme-IqFf-h4PrAC
Since both the host system and the one I was wanting to back up were both centos I had to rename the second one to something else. I used centos2
vgrename -v AQjjAr-C4Lg-O3qX-Y0RN-hsme-IqFf-h4PrAC centos2
You will probably need to make it active
vgscan
vgchange -ay
Make a mount point. I used /asusl (the hostname)
mkdir /asusl
Mount root and home
mount /dev/centos2/root /asusl
mount /dev/centos2/home /asusl/home
Backup to with something similar to this. Where /Syn12/Backup is my mounted back drive and AsusL is the folder for this host.
cd /asusl
find . -type f -print | grep -v "/dev/"| grep -v "/.cache/" | grep -v "/.minishift/" | cpio -pvmd /Syn12/Backup/AsusL/ 2>&1 | grep -v "newer" 2>&1 > /Syn12/Backup/AsusL/cpio.out
But this only works if that PC you are putting the drive into is an older one. Because as I found out ....
vgrename -v AQjjAr-C4Lg-O3qX-Y0RN-hsme-IqFf-h4PrAC centos2
You will probably need to make it active
vgscan
vgchange -ay
Make a mount point. I used /asusl (the hostname)
mkdir /asusl
Mount root and home
mount /dev/centos2/root /asusl
mount /dev/centos2/home /asusl/home
Backup to with something similar to this. Where /Syn12/Backup is my mounted back drive and AsusL is the folder for this host.
cd /asusl
find . -type f -print | grep -v "/dev/"| grep -v "/.cache/" | grep -v "/.minishift/" | cpio -pvmd /Syn12/Backup/AsusL/ 2>&1 | grep -v "newer" 2>&1 > /Syn12/Backup/AsusL/cpio.out
Putting it back
Now to rename it back you need to put in a system without a vg named centos. This probably means the target PC booted from a "Live" CentOS image.But this only works if that PC you are putting the drive into is an older one. Because as I found out ....
Things sure have changed
But it seems UEFI has changed a bit since the newest model Linux PC I have was made. They have added all kinds of safe guards to the Dell BIOS which block booting from anything. Add to that it seems there are also issues with the video chips in the Dell. Then too there seems to be issues with SpeedStep and TurboMode which the the Acer does not seem to let you disable. Which means the Acer probably can't be used. So I gave up on it and focused on the Dell. Oh and some have reported issues RAID / disk drivers which might be why I never got any image to boot from the DVD.

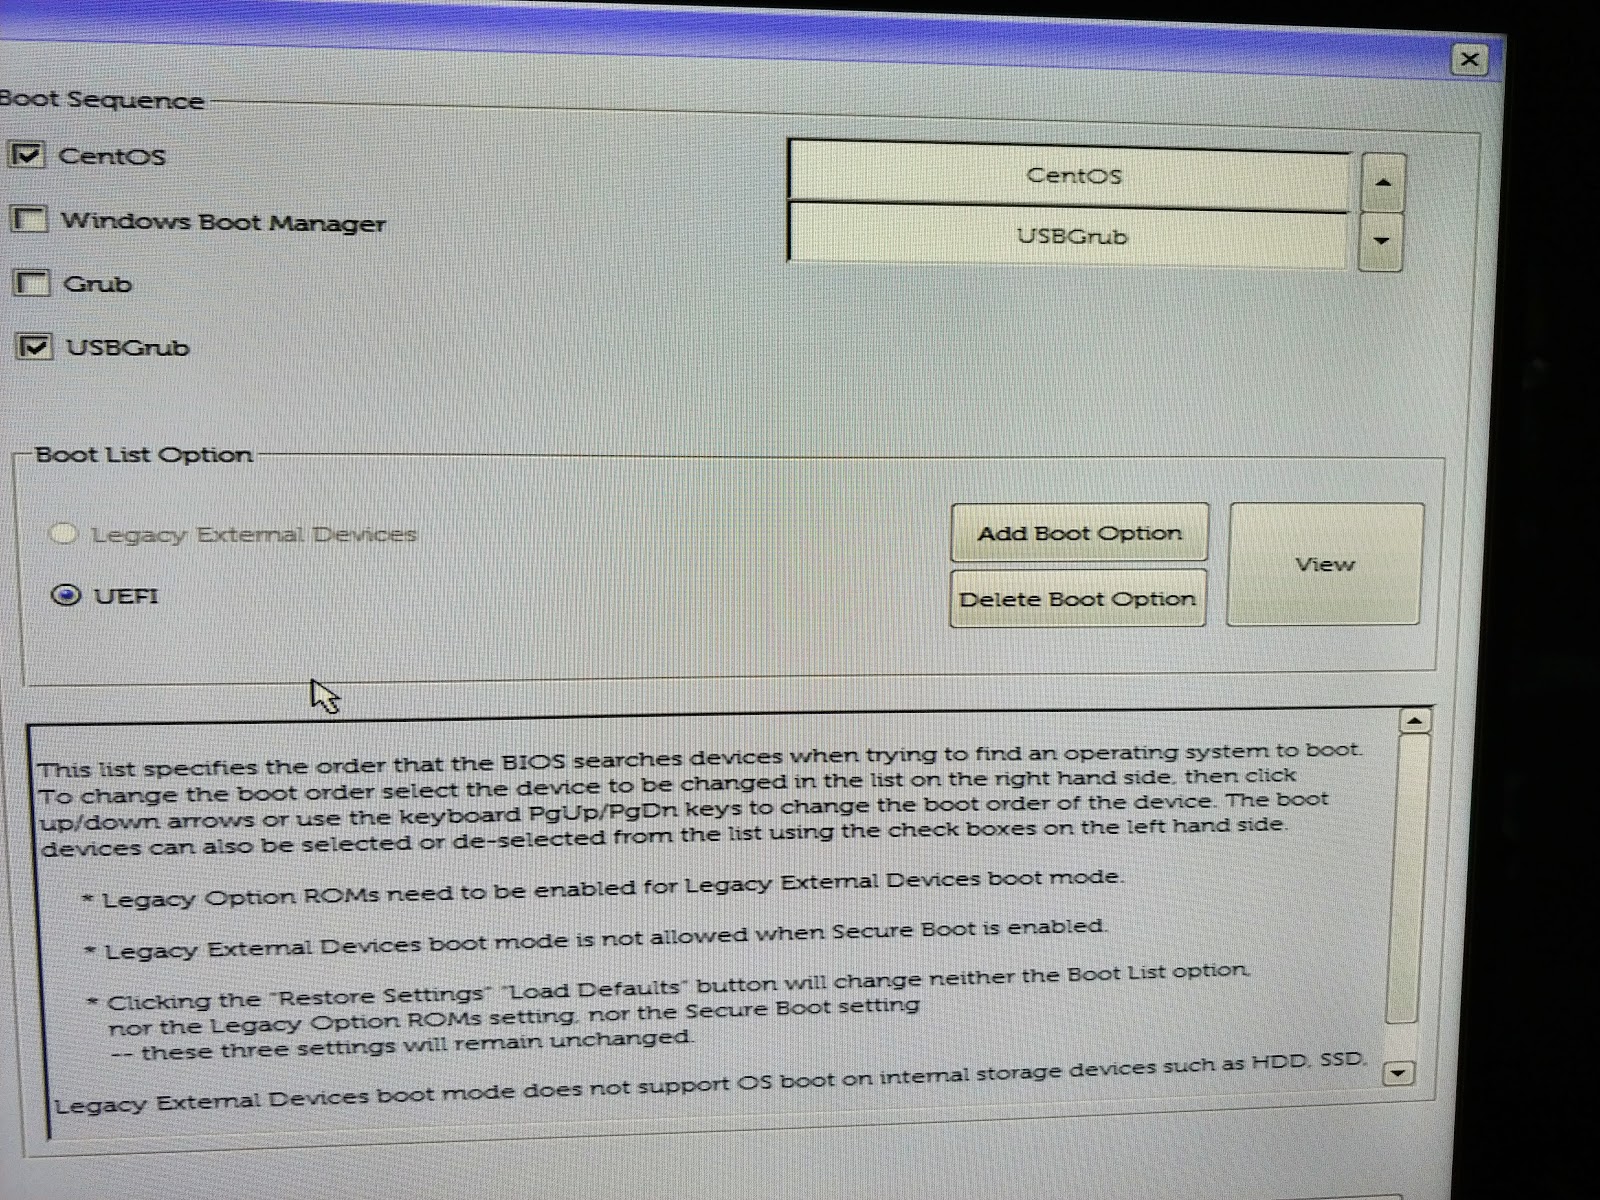
After trying all kinds of suggested options, I finally got it to load the install program and even install onto the drive by disabling UEFI support. But then the Dell would not boot from the HD. A bit more fiddling I got it to boot from USB with UEFI enabled (with some errors) but it could not see the HD. BIOS did see it but would not let me added it to the secure boot list. The PC will only boot from the files in this list. An entry looks like this.

And you can't add any "legacy" internal devices to the list. The last magic bit was to turn off "RAID mode". Since there is really only room for one spinning drive in the system I'm not sure why it was on much less has any effect.
More issues
So at first I tried the HD from the spare PC to see it there might be something I was missing or some way to "repair" the actual drive. Once I sorted the above it seemed to install OK but I still had the issue it did not seem to want to let me add the HD boot file to mistake it for the one on the smaller drive. Granted I could maybe hack it by going through some more girations to clone the boot partition from the small drive onto the large drive but this many days in it seemed like good time after bad. So I decided to go for broke and reinstall on the large drive. It is backed up after all. Though I'll still need to setup apps. Not only that, but install the 32 GB of memory and the ZOTAC GeForce 8400GS graphics card - GF 8400 GS - 512 MB from the old server. But the system would not even boot with the video card in there. Not sure if it is a power supply issue (which appears to only be 240 watts and proprietary) or that it is an X16 card (the specs do not say it is an x16 slot though it is the right size and some have posted that they got X16s to work). So I stuck in an old GTX720 I had. (I do not plan to do any serious graphics on there anyway.) That at least booted. However the CentOS 7.6 installer could not start X on it. I did not want to install in text mode and then maybe not have the graphics drivers installed so I keep tweaking. I finally had to go into BIOS settings with the cable connected to the GTX card and set it to use the motherboard's Intel 630 as the primary and move the cable while it rebooted. Once installed though X does appear to use the GTX OK once I set the primary video back to auto. So probably yet another driver issue.Below are the settings I ended up with.
Note some of these need to be changed one at a time and in order. For instance you can not disable legacy ROMS till legacy boot has been disabled and options saved. Alert will pop up if you try telling you where the conflict is.
SpeedStep disabled

Secure boot enabled

PTT off (unselected)

Disable legacy stuff

Now to reinstall the other stuff that was on there:
apcupsd
Install basic LAMP stack
Note I found I also needed to open the ports after this to get to the web server from another PC. Commands for this are:
firewall-cmd --zone=public --add-port=80/tcp --permanent
firewall-cmd --zone=public --add-port=443/tcp --permanent
firewall-cmd --reload
Webadmin
installed modules userAdmin, samba, apache, mysql, exports-nfs4, fetchmail, firewalld,
sudo yum install mod_session -y
sudo yum install mod_form -y
sudo yum install mod_auth_gssapi -y
sudo yum install mod_auth_kerb -y
sudo yum install mod_nss -y
sudo yum install python-pip mod_wsgi -y
Create and install a self signed cert
Commented out iRedMail, RoundCube and AwsStats stuff and got http up again. This time with TLS support.
Then removed Weewx and started with fresh install because something was still missing. It appeared part of the app was looking for Python 2 stuff and other bit Python 3. Did a manual reconfig and was up and running.
Note when you run
sudo wee_config --reconfigure
be careful. The backspace key gets recorded and shows on the web pages as an unknown character.
Looked at the instructions on migrating my DB and template customizations from the old version I was on to the current one looked like a week's worth of work. Did not think it would have changed that much.
Using the WeeWX Customization Guide I added add the soil moisture station though it is on its last legs. To do that I needed to edit my /etc/weewx/skins/Seasons/skin.conf and /etc/weewx/skins/Seasons/index.html.tmpl. Seasons it the default template now.
NOTE if the clock is even 1 ms slower than the console WeeWx may ignore data. Though this is usually only an issue on Raspberry Pis.
Might wait on the rest of this too. I was about to try Shinobi's NVR on that system before it cratered. Got a few things ahead of that in the queue now.

Might wait on the rest of this too. I was about to try Shinobi's NVR on that system before it cratered. Got a few things ahead of that in the queue now.
Install iRedMail
RoundCube mail
Install AwsStats
More Gotchas
Not enough space for "grub2 to embed core.img"
I found all kinds of bad advice for this one. Mainly saying core.img needs to be light behind the boot record. I was getting this trying to setup a second drive. The issue was Windows 10 (installed on first drive) had marked the second drive GPT. Going into Windows and switching it to MBR sorted it.

Can't boot from CentOS USB newer Asus motherboard.
When installing on a new custom build with an Asus motherboard I found the above Dell hoops were different on the Asus. Easier but diff. For the Asus you need to go into the BIOS settings and set the partition USB partition to boot from. In my case it seemed I needed to use the one (of three) that did NOT have UEFI in the description.
Here are some screenshots of the Asus interface.
CentOS 8 losing support
For the new build I was going to put on CentOS 8 on it but in an odd turn of events Red Hat is dropping support for CentOS 8 but continuing support for CentOS 7.
No comments:
Post a Comment